
SUMMARY
In this blog, you will learn how to utilize the RestartAnalysis extension in Ansys Mechanical to expand a multistep analysis by incorporating additional time steps and boundary conditions without losing the already calculated results. An example will illustrate this methodology.
The problem:
You are performing a complex or large multistep finite element analysis, and suddenly, you realize that after hours of solving, you need to add or modify a boundary condition. In this scenario, you want to preserve this initial simulation part, which will not change, and you have invested hours in solving it. A typical example of this situation is a Bolt Preload analysis followed by several different load scenarios. In this case, you would like to keep the preload results and focus solely on the subsequent analyses.
If you are an APDL user, this is not a significant issue. The Multiframe restart technique is the solution for you, nothing new. However, currently, most users are fans of Ansys Mechanical and they are not keen on using the .rdb, .rst, and .rnnn files. Knowing the necessity to rerun the analysis from the beginning is just discouraging.
The solution:
Fortunately, in Mechanical, there is a direct method to achieve this without compromising your previous results, as often occurs when adding new boundary conditions and using restart points. The most effective way to illustrate this is through a step-by-step bolt preload example.
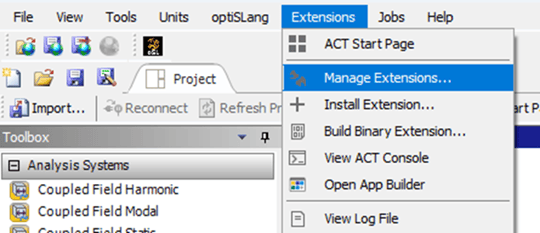
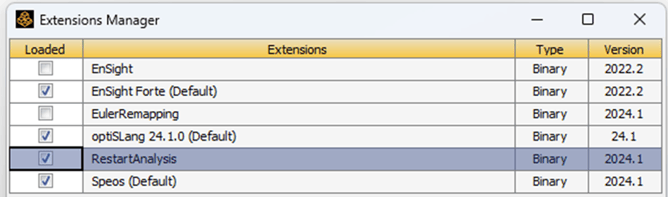
- The first thing you will need is to activate the Restart Analysis Extension in Workbench.
- Then, you can create your initial Preload Analysis in Mechanical as usual and set ‘Retain Files After Full Solve’ to ‘Yes’. Note the number of steps of this example’s initial analysis is two, but you can define as many steps as necessary.

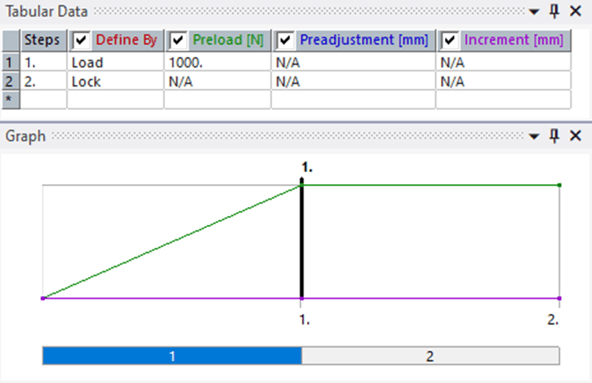
- In this example there is a Frictional contact between both parts, a fixed support, and a Beam connector with the preload defined using two steps. The first step applies a load while the second step involves locking to maintain the modified length calculated to generate the initial load.
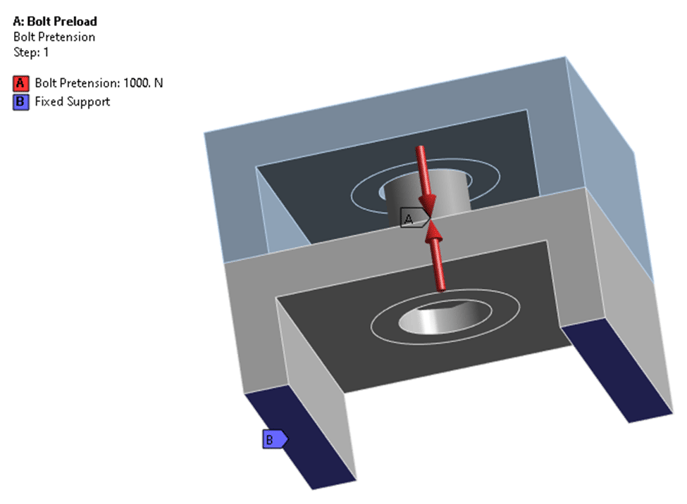
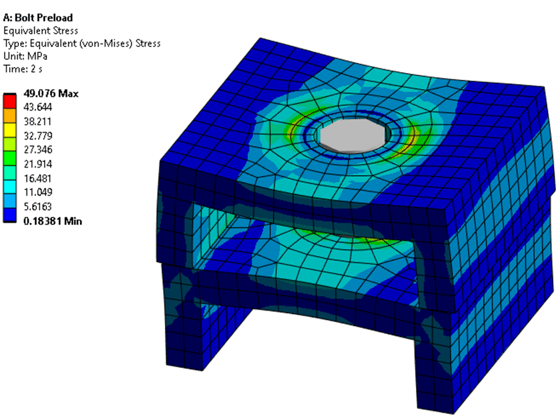
This model shows the expected results. Is possible to extract and analyze result data.
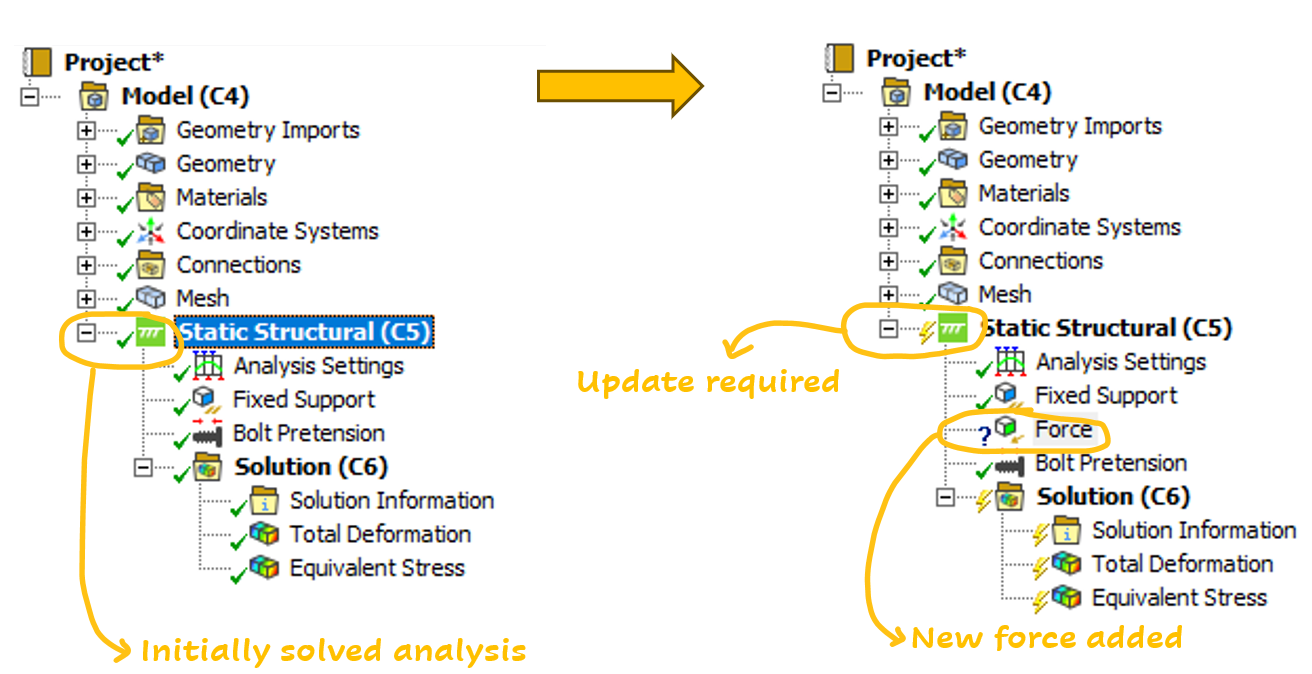
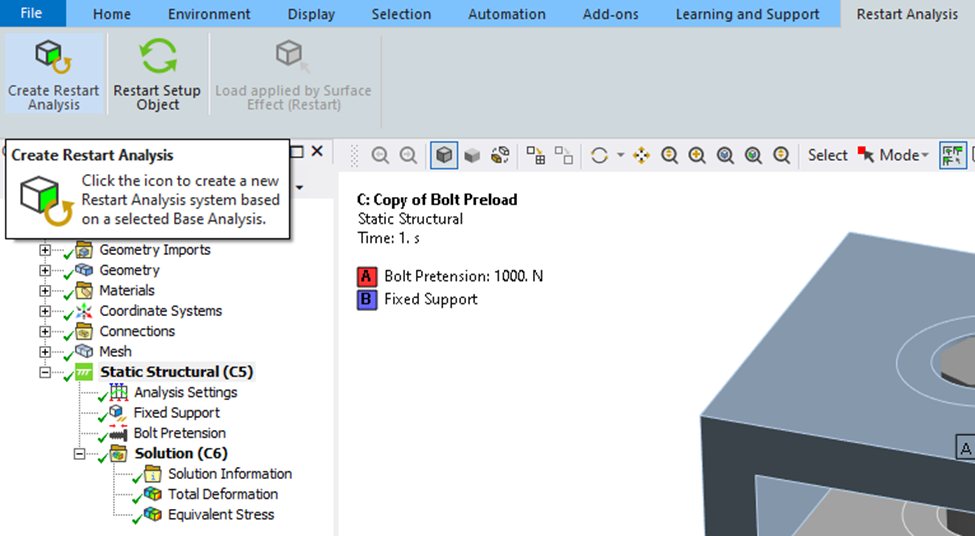
- Now, to create the subsequent analysis, you need to navigate to the Restart Analysis Tab (Ensure you have activated the extension in WorkBench before accessing it). With the Static Structural Analysis outline branch selected, simply click on the 'Create Restart Analysis' button.
Now, there is a second analysis in the Outline.
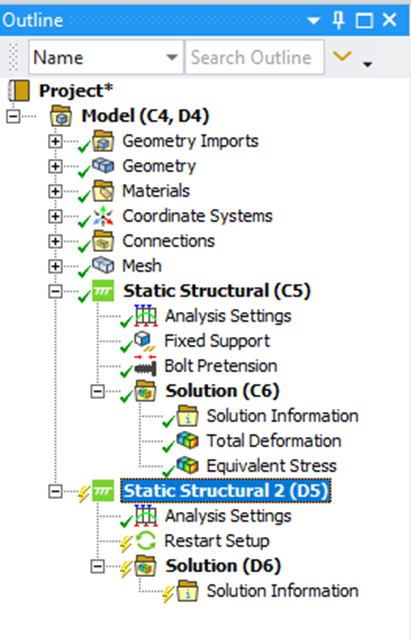
For the new ‘Restart Setup’ object default settings work well.
- In this second analysis, it is possible to add new boundary conditions. For instance, in this example, a horizontal force of 1000N is applied to the upper body to bend the bolt and slide it away from the base part.
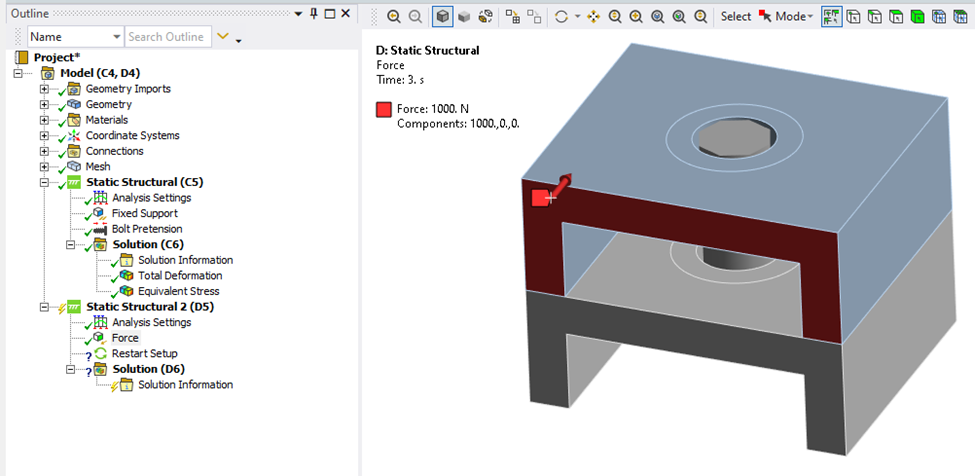
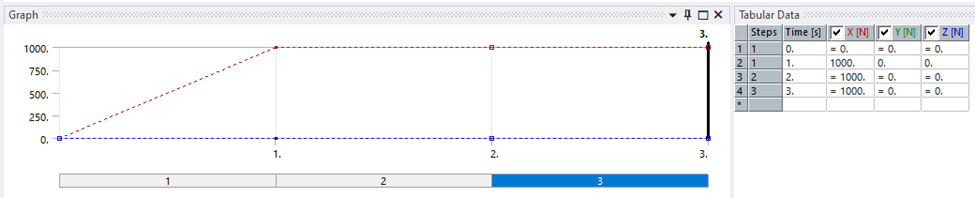
Note that the force is defined from the first timestep. This does not pose a problem in the simulation, as steps one and two have already been solved, and this new force will not affect the results. It is important to set the 'Applied by' property as 'Direct' in this case.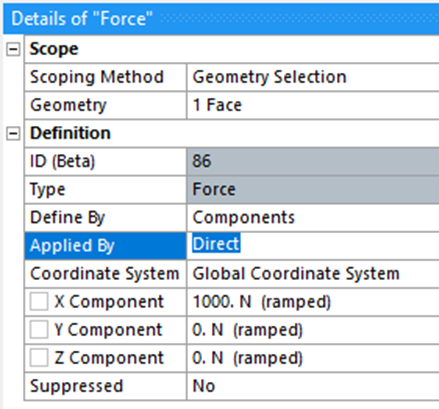
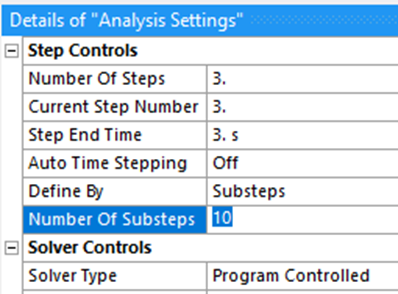
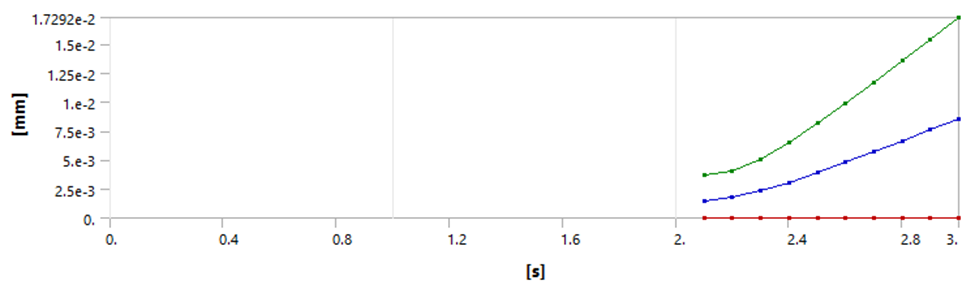
- The second analysis has three time steps. We're going to focus on the third one. I added 10 substeps solely to observe some intermediary results.
The results obtained are as expected, you can appreciate the relative displacement between these two parts generated by the applied force.
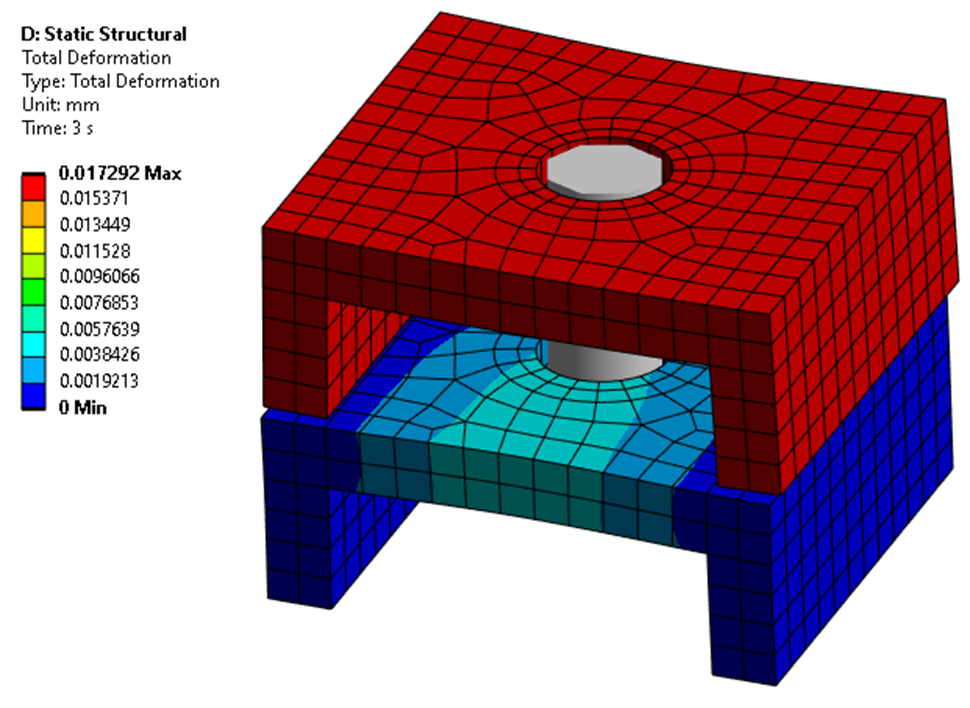
The lateral displacement starts from t=2.0
CONCLUSIONS
This extension allows users to overcome the difficulty of modeling subsequent time steps without losing results in a simple and direct manner. This feature can also be used to model several parallel load scenarios that start from a common base. That will increase productivity and let engineers to focus in the analyses results and not in repeating boring tasks.