
SpaceClaim and Discovery Scripting
SpaceClaim/Discovery scripting in Ansys involves using scripts to automate and customize geometric operations in Ansys SpaceClaim/Discovery, which are 3D modeling and geometry editing software. It allows users to create, modify, and manipulate geometry more efficiently and robustly. These scripts can be combined with Ansys Mechanical to enhance the overall project robustness by streamlining the geometry preparation process and ensuring consistent, error-free model generation. Once the model is generated, it can easily be linked to an existing Mechanical workflow to help make your model more robust!
Please note, SpaceClaim and Discovery are 2 different CAD tools offered by Ansys. Discovery is the newer tool and utilizes all of the same capabilities as SpaceClaim. These scripting capabilities were originally developed for SpaceClaim, but have also been integrated into Discovery as well.
Here's how SpaceClaim/Discovery scripting contributes to robust geometry handling and how it complements Ansys Mechanical:
- Automation and Repetition: SpaceClaim/Discovery scripting automates repetitive tasks and geometric operations, reducing the potential for manual errors that can occur when creating or modifying geometry. This automation ensures consistency and robustness in the geometry generation process.
- Customization: Scripts can be tailored to specific project requirements, allowing users to create custom tools and workflows for geometry manipulation. This customization enables engineers to address complex geometric challenges more effectively.
- Parameterization: SpaceClaim/Discovery scripting can be used to parameterize geometric features, making it easier to adapt and adjust the model for different design scenarios. This parameterization enhances the project's flexibility and robustness by allowing quick geometry modifications.
- Quality Control: By using scripts, you can enforce quality control checks on geometry. For instance, you can ensure that specific design constraints or tolerances are met, which contributes to the robustness of the design process.
- Integration with Ansys Mechanical: SpaceClaim/Discovery scripting can be seamlessly integrated with Ansys Mechanical. This integration allows for the automatic generation of complex, optimized geometries that are ready for structural, thermal, or other analyses. By automating the geometry preparation phase, you reduce the chances of errors or discrepancies when transferring geometry to Ansys Mechanical.
- Parametric Studies: SpaceClaim/Discovery scripting, combined with Ansys Mechanical, facilitates parametric studies by enabling the quick modification of geometry and the assessment of various design alternatives. This capability is valuable for optimizing designs and ensuring robust performance under different conditions.
Basics
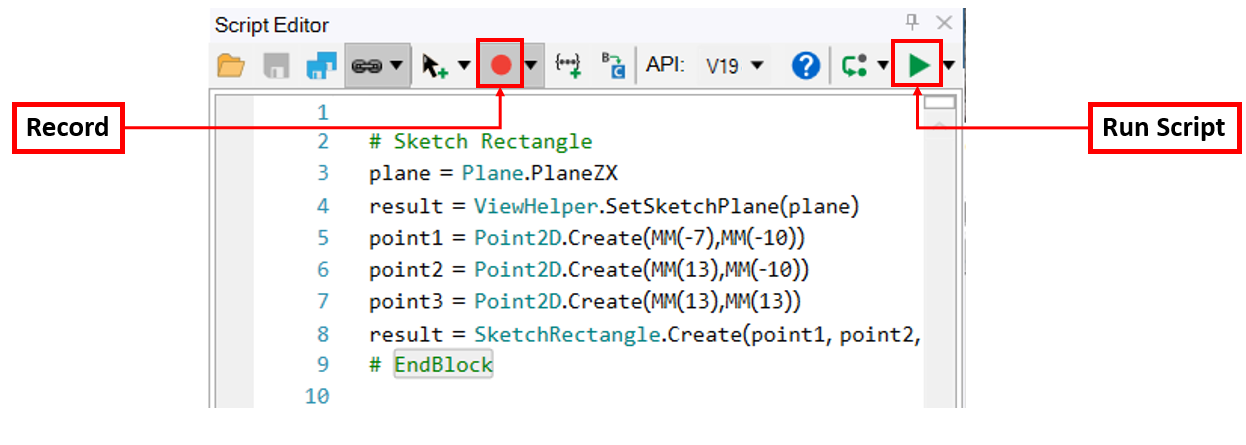
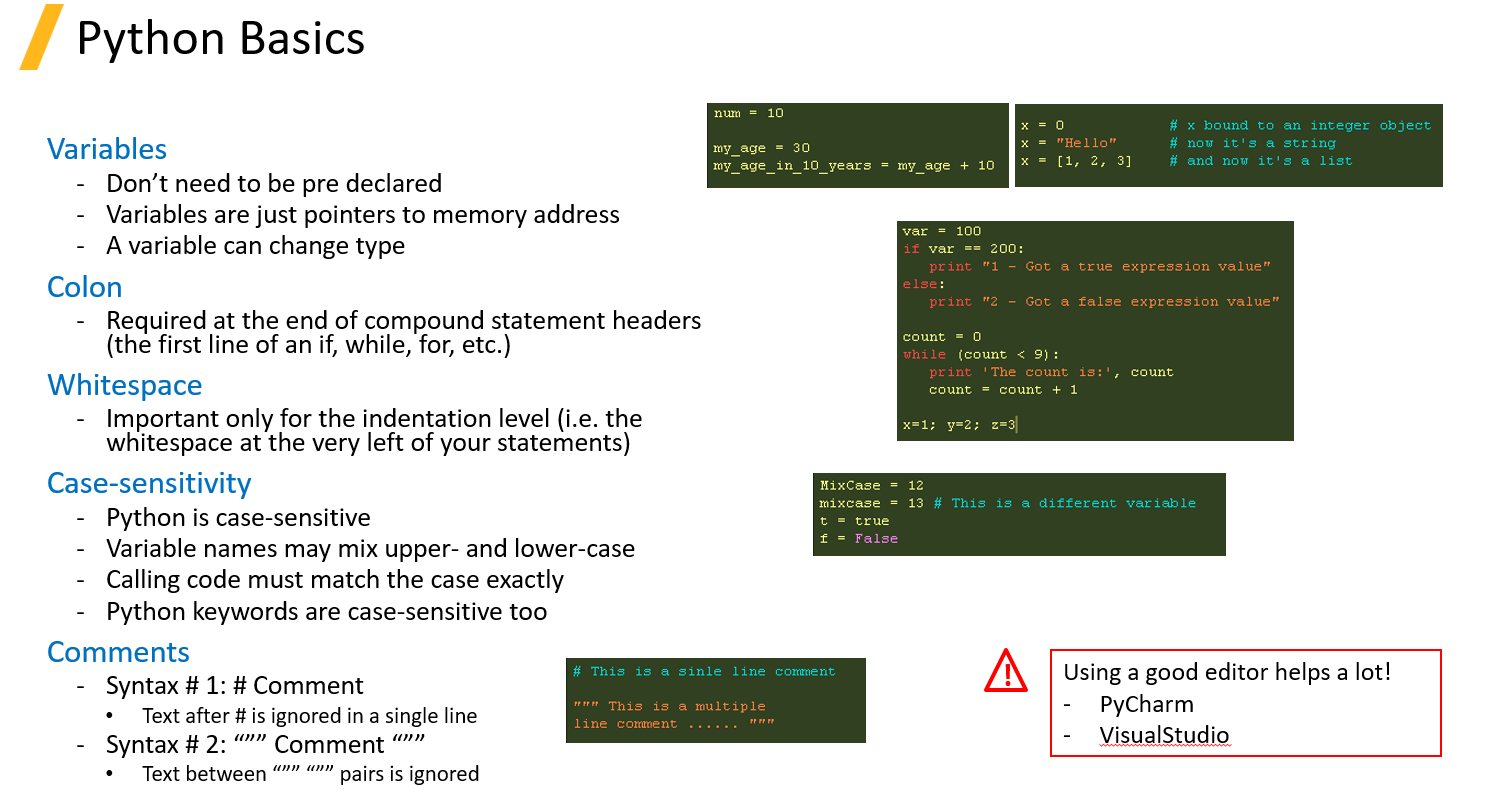
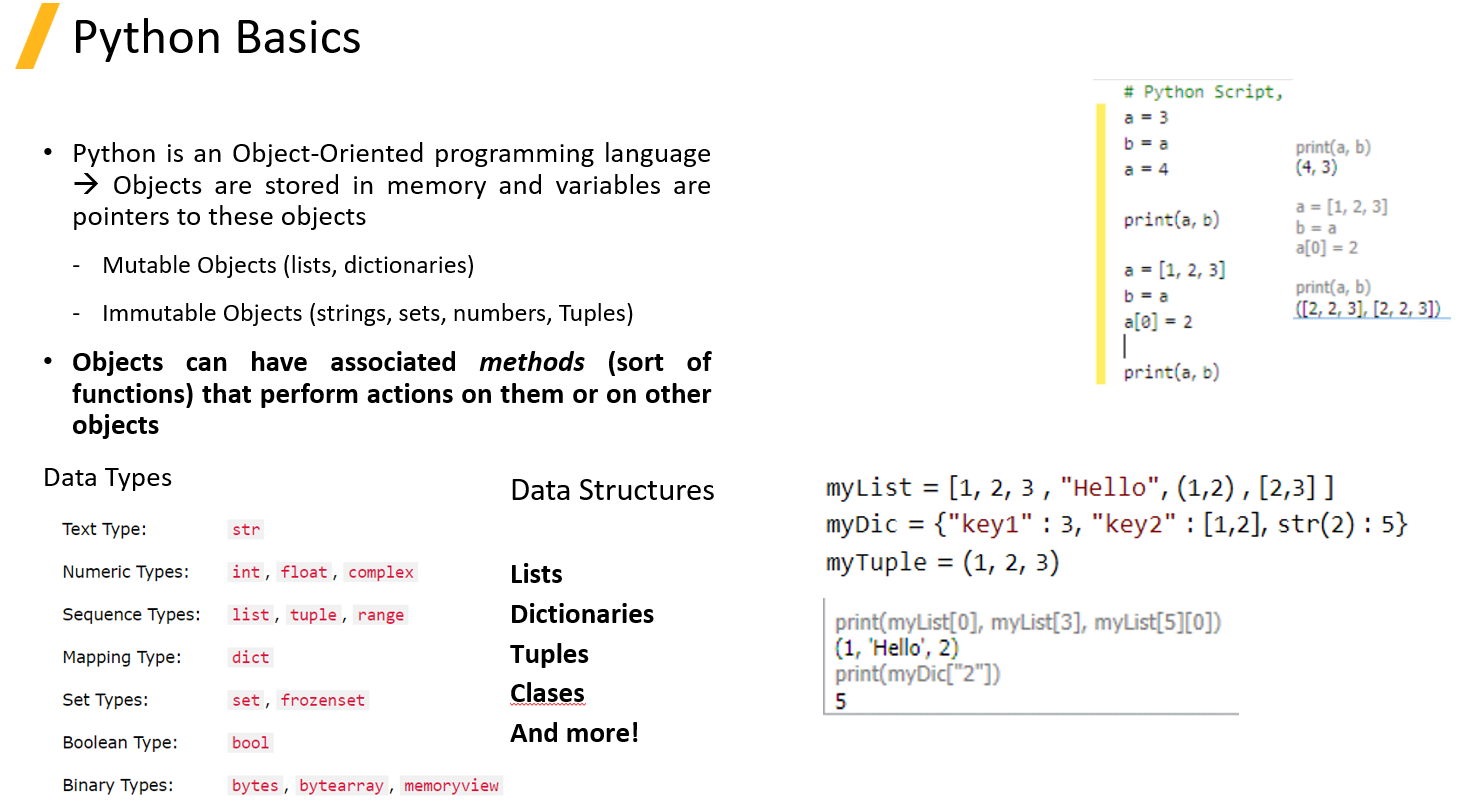
It is important to know that SpaceClaim/Discovery scripting is based on IronPython. Therefore, it is compatible with IronPython's modules. However, it is NOT required to be an expert in Python before starting up with SpaceClaim/Discovery scripting! This is due to the "record" feature from within the scripting tool. The "record" feature allows you to record certain actions being completed from within the GUI. For example, if you were to sketch and extrude a rectangle on the XY Plane, the recorder, if turned on, will automatically write out the commands for those actions in the editor! This is helpful for understanding things like the select logic, operations etc. These recorded commands may also be edited to assist with making your script more robust. Before adjusting the recorded script, it is recommended to review the basics of Python to help you understand the workflow. Some of the basics are listed in the images below, but more reference material will be provided at the end of this blog to help get started!
Select Logic Overview
There are 3 ways to select entities in SpaceClaim/Discovery scripting.
- Smart Variable (Default)
- Combines the other methods to make selections persist better when playing scripts
- Stores more information than any of the other types and is much more robust in matching the selected entity during geometry changes
- To use smart variables, the script has to be saved as .scscript file (not a .py file). Smart variables are objects created in the background and contain a lot of metadata about the selected item. This data is then saved in the .scscript file, but gets lost in a .py file
- Example: Selection.Create(Face1)
- Index (Body/Children Heirarchy) --> Preferred Option
- The internal index of each selected entity.
- Example: Selection.Create(GetRootPart().Bodies[0].Faces[3])
- Ray (Location-based)
- The internal ray fire point and direction. Can be advantageous when working with STL files.
- Example: Selection.Create(RayFire.Fire(Point.Create(MM(230),MM(260),MM(407)),Direction.Create(-0.4,-0.5,-0.75), 0.0001,0.0005([1])
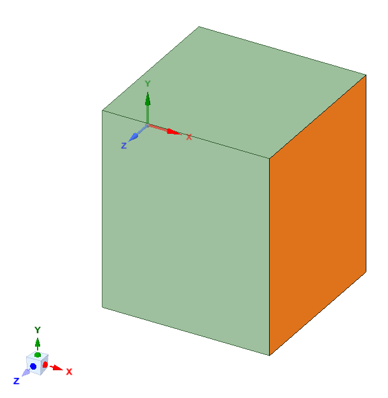
All the examples above are used to select the simple surface below.
Integration with Mechanical
Once you generate your CAD model using your script, you'll need to import it into Mechanical. When you do so, many of your boundary conditions and mesh controls may become invalid as the geometry changes. To avoid this, we can utilize the power of using Named Selections. For anyone unfamiliar, a named selection is a user-defined grouping of entities (such as nodes, elements, or surfaces) within a finite element model, assigned a specific name for easy reference and application of boundary conditions or loads. In Mechanical, they can be defined in 2 ways: By manually selecting the entities you'd like to create a named selection for, or by using the Worksheet function. To use the Worksheet, insert a named selection and change the "Scoping Method" in the details from "Geometry" to "Worksheet".
Once the option has been changed to Worksheet, you'll need to go to the Worksheet section to enter the selection criteria. The selection criteria can be used to determine what entity you'd like to select (Faces, Bodies, Edges etc). These entities can be filtered by size, location, distance and other criteria. You can also combine different criteria to help include (or exclude) other entities. In the example below, I've used a size criteria to select the top surface of the cylinder as shown below. However, the size criteria by itself will select both the top and the bottom, since they're both the same size. To remove the bottom surface from the selection, I've also included a "Remove" function in the worksheet to remove all faces below Y=1 mm (note, the bottom cylinder surface lies on Y=0 mm). With both of these criteria defined, I am able to refine my selection to just the top surface as shown below. The idea here is that, if you're expecting different features to lie within a specific range of sizes and shapes, we can account for those things here in our named selection definition. That way, when our model is adjusted using our SpaceClaim/Discovery script, the same entities will be selected between each iteration.
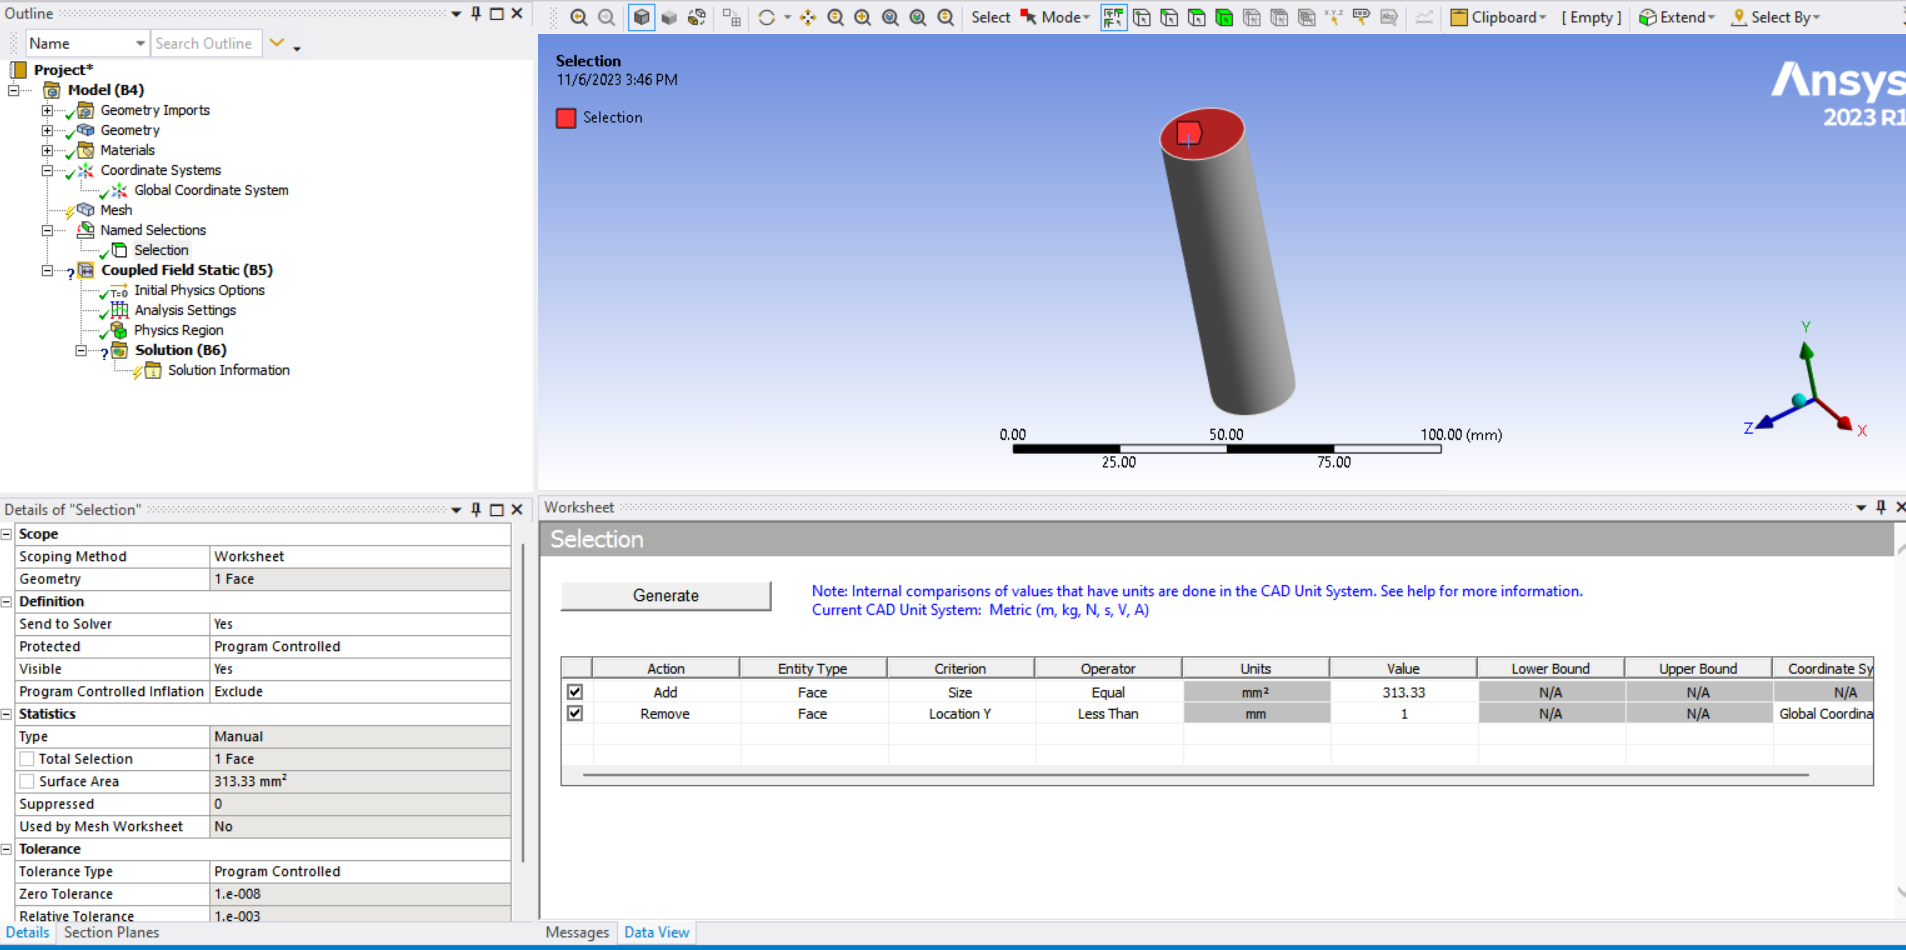
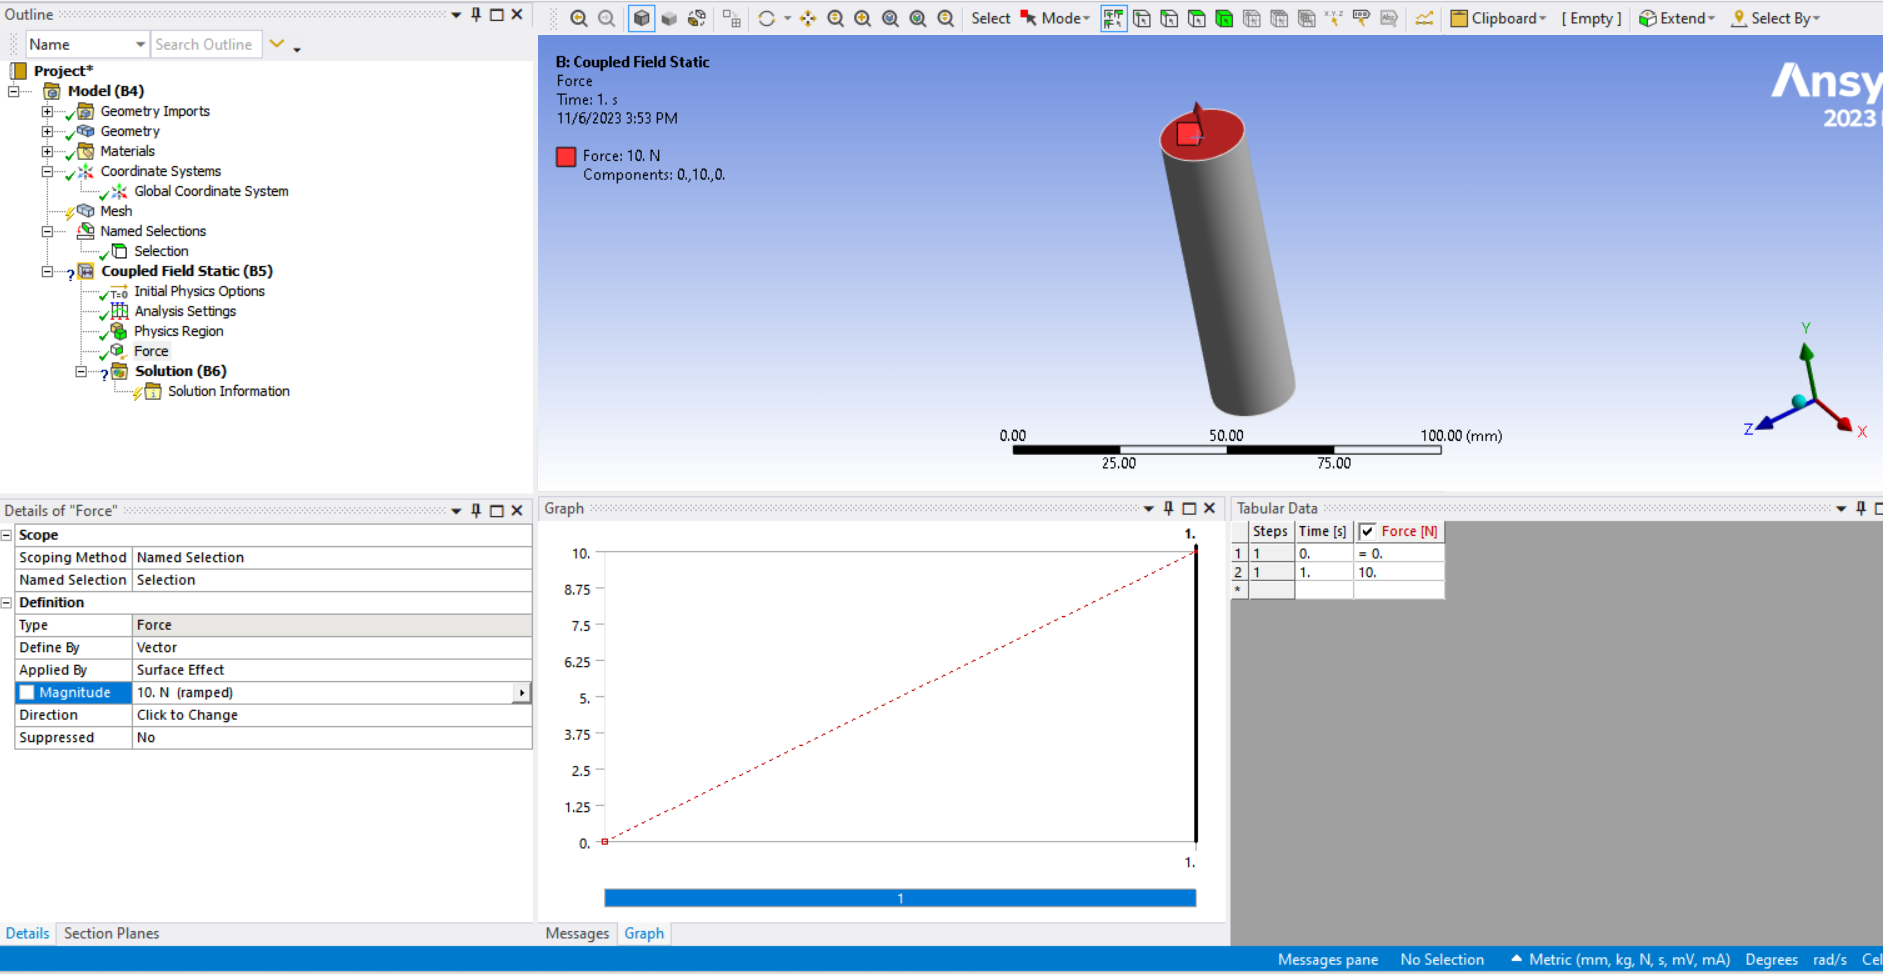
Once I've generated all my named selections, I can then use them to define my boundary conditions and mesh controls instead of using the manual selection criteria. To do this, you can navigate to the "Scoping Method" for your boundary conditions or mesh controls, and change them to "Named Selection". Then, you need to choose which named selection to apply to each boundary condition. Since our named selections have been set to account for all the different sizes and shapes of our model, they'll be automatically updated every time based on the criteria we defined. Once they update, those named selections will also automatically be applied to our boundary conditions! This means, we do not have to spend time re-selecting everything each time we adjust our geometry. Once the model is updated, you'll simply need to make sure the material definition of your CAD model is correct, then run!
A more fleshed out example of this process can be found on our YouTube channel (see below).
Free Resources and Materials for Learning Python
http://www.python.org/
- Python download all formats
- Tutorial and documentation
https://github.com/IronLanguages/iron...
- IronPython studio is free Microsoft SDK that allows you to manage your - projects and develop using native windows forms
http://www.tutorialspoint.com/python/...
Free book - http://greenteapress.com/thinkpython/...
Recommended books
- Learning Python by Mark Lutz and David Ascher
- Python Pocket Reference by Mark Lutz
- IronPython in Action by Michael J.Ford and Christian Muirhead - For people wanting to use Iron python to take advantage of the .NET framework